How to run Etsy sale
If you decided to run a sale in your shop you can do it by going to Promotion -> Sales events tab at Seller Tools. Just hit a green button "Schedule sales event" and you will see a page that has all the settings for your sale. We will give you a step-by-step instructions to help understand all required (and optional) fields and what to put in there.
First of all, you need to choose your shop and the event type for this sale. There are two types of sale events: regular sale and clearance. The main difference between them is that for clearance sale you don't have to put an end date - it will run until all items you've put on sale are gone (or until you stop it manually).

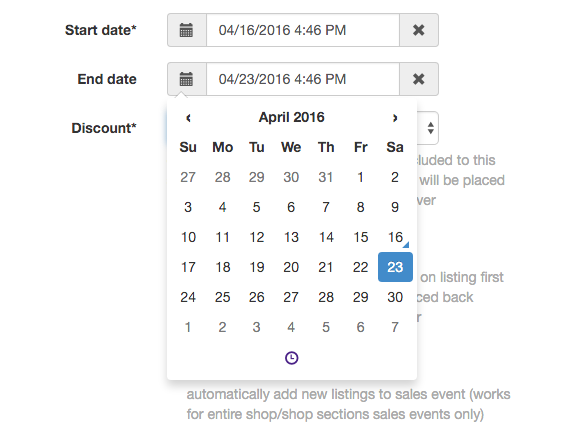
Now choose start and end date for your sale. You can start the sale right away or you can schedule it for some time in the future. The end date is totally up to you.
Now it's time to specify the discount for this sale. You can choose either percent discount or dollar amount discount. This discount will be applied to all listings included to this sales event. After sales event is over regular prices for all listings will be placed back automatically.
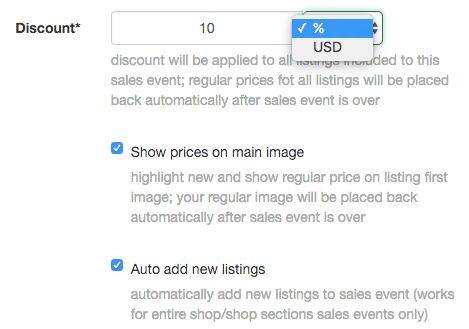
Here you can also choose if you want to show prices on your main image. With this checked there will be a line of text added to the top of your main image that will show your sale price in red and regular price in grey colors.
"Auto add new listings" is a useful option if you run a sale in your entire shop or in some specific section. With this turned on if you add new item to the shop or that specific section - the item will be added to the sale event automatically.
You can also add a title prefix to your sale items titles. It's a great way to show customers that this item is on sale right now. You can put there any text you like, but it shouldn't be very long. After the sale is over all prefixes will be removed from the titles automatically.

Now it's time to choose where you want your sale to run. You can choose either "Apply to entire shop", or choose shop sections, or even choose specific listings, or you can choose a section and some specific listings. As you can see - this setting is very flexible to suit any needs.
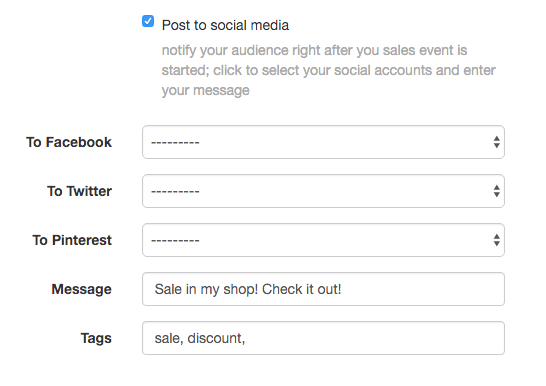
If you would like to post your sale to social media to promote it there too - it's really easy to do. Just check "Post to social media" and pick the pages you want to post this sale to. Add the message to this post and tags to promote the sale.
These are all basic settings for your sale. If you don't want to dig into advanced settings - just check the box that you've read sales event manager guidelines and FAQ and hit the green button on the bottom. This will create a sale event for your shop.

Now for those who want to check the advanced setting as well - here is an overview of them.
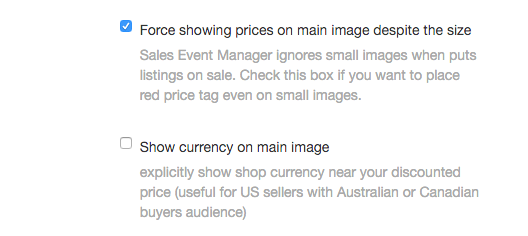
Here you choose if you want to put a price on your photo even if it's small. Be aware that if you check this box, with that price line at the top - the picture will show even less of your item.
You can also check "Show currency on main image" if you want to show your shop currency. This can help avoid confusion with $ sign for USD, CAD and AUD dollars.

Also you can choose a section you want to exclude from the sale. It might be useful if you want to run a sale in entire shop except some specific section (or sections). You can as well exclude specific listings this same way.
Description prefix works just like a title prefix. You can add here any text that will be removed automatically after the sale is over.

And the last two settings we have here give you an option of where to put the sale price line on your picture and how you want to crop your main image. This last one might be useful if you have collages on your main photo.
Don't forget to agree to sales guidelines and press "Schedule sales event" button to finish the process.
Related articles
How does sales event manager work?
It's very easy to schedule new sales event with Seller Tools. Read more...
How long does it take to start sales event?
Any sales event setup process is quite easy and takes about one minute (depends on listings you want to include/exclude from the event). Read more...
How to stop my sales event?
To stop your sales event click "edit" near it and then click "Cancel sales event". Read more...
I want to change title/description or add more variations during sales event
You are free to make any changes during sales event. Please go ahead and modify your listings. Read more...
Sales event manager guidelines
Sales event manager is a tool from Seller Tools which provides smart and no hassle way for running sales events. It supports two types of sales events - regular sales and clearances. Read more...
Will regular listings price be back after sales event is over?
Yes, we always restore your regular listing price unless you change it manually during sales event. In this case we will calculate after sales event price based on your settings and set it. Read more...
Help center categories
It has allowed us to clear out old inventory with the sale feature! Our Etsy sales are 293% up since we started using Seller Tools! We are very happy to finally have our Etsy Store as successful as our Amazon!